...you start thinking, "I could do that!"
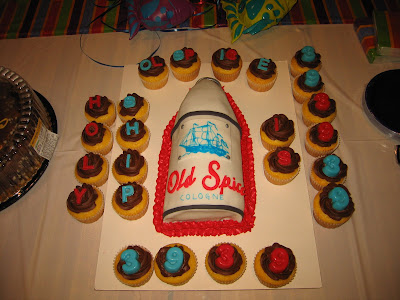
Cake #3 for me last week was the 39th birthday cake for my fiance. He's in the "best" branch of the military, and it just so happens that his nickname from his time spent overseas is "Old Spice". As in, the cologne. He even has the Old Spice clipper ship tattooed on his arm. So when I was thinking about what to make for a cake, I fist settled on some cupcakes with letters to spell out Old Spice and maybe a couple small ship decorations.
Then I had a stroke of ... genius? Insanity? Maybe a bit of both. I have a confession to make. I am an Ace of Cakes addict. I absolutely love that show. If I had it to do all over again, I would go to pastry school, move to Baltimore, and try to get a job with Duff and the crew. What a fun group of talented, creative people! If you have never watched Ace of Cakes, the show is about a business called Charm City Cakes that makes the most wacky, off the wall, amazing cakes for pretty much any occasion. The thing is, just like all professionals, they make even the most difficult techniques look really easy. So after you watch a few dozen episodes in a row (thanks to your DVR) and down a few Jack and Diets, you begin thinking that maybe carving a shape out of layers of cake isn't that big a deal.
I was about to find otherwise. So my stroke of genius told me I should make a cake in the shape of an Old Spice cologne bottle, cover it with fondant, and complete the look with a silver top and the ship design and Old Spice logo. I'd do the bottle laying on it's side, not standing upright. (Even on my bravest day, I wouldn't attempt that!) How hard could it be?
I started with 3 9x13 yellow cakes, cooled, leveled and the edges cut off to make perfect rectangles. Layer 2 went fine on top of the first layer, with a generous helping of chocolate buttercream to cement the 2 together. However, layer 3 had a mind of it's own. The cake cracked when I flipped it over to lay on to layer 2, and by the time I had it resting on top of the second layer, it was in about 7 completely irreparable pieces. There was no way in the world that I cold stick the pieces together with enough frosting to make it work.
A few cuss words later, layer 3 was resting in my garbage can, and I decided to sculpt the bottle out of 2 layers instead. The cake with 2 layers was about 4 inches thick, big enough for me to sculpt into the dome shape I wanted. The next challenge was carving the cake to resemble the Old Spice bottle. Compounding the challenge was the fact that I had already frosted the top of the second layer to prepare it for layer 3, so I was carving into a chocolate buttercream MESS.
A few more cuss words, however, and I had the shape I wanted. The sides of the bottle sloped in a semi circle down to the cake board, and the top of the bottle sloped down to the cap. Not too shabby! I gave the whole thing a dirty look, a generous coating of chocolate buttercream, and set the monster in the fridge to let the frosting harden for the fondant layer.
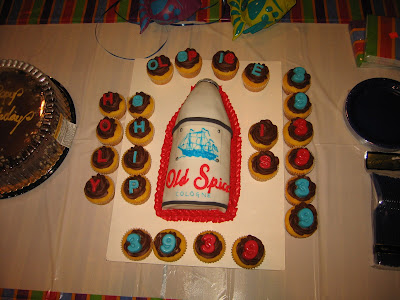
Meanwhile, I realized that the shape I had carved had really shrunk the size of the cake, and I was afraid there wouldn't be enough cake to go around at the birthday party. This called for cupcakes! While the cake was chilling out, I made 24 yellow cupcakes with chocolate buttercream swirls on the top, then experimented with molding letters and numbers (39!) out of candy melts in blue and red to match the Old Spice logo colors. The cupcakes came out great! Here they are:
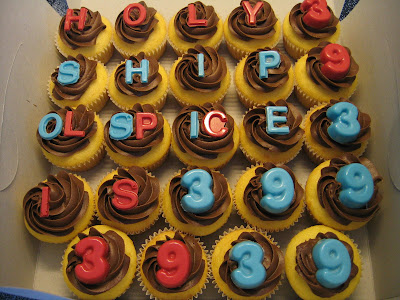
Holy Ship... get it? HAHAHAHA
Ok. Back to business. After pulling the cake out of the fridge, I used an offset spatula to smooth out any big ridges in the buttercream, and prepared myself for my first EVER attempt at covering an entire cake in fondant.
I rolled out a large circle of fondant super super thin, then draped it carefully over the cake. Then I realized it wasn't quite large enough to cover the entire thing. A few more cuss words... and a bit more rolling, and it was finally the size I needed. I used a fondant smoother to get rid of any wrinkles and bubbles. The covering wasn't perfect, as you can see below, partially because the frosting job wasn't as smooth as I thought it looked, and partially because of the weird angles of the bottle shape itself. After cutting off the excess fondant, I decided I could disguise some of the imperfections on the edges with a decorative icing border later on.
I laid on the Old Spice logo, ship, and bottle cap that I had created earlier, and... taa-daaah!
Here's what I had:
I used those Wilton FoodWriters to draw the ship and write "cologne" on the bottom of the bottle. The Old Spice logo, gray cap, borders, and "tacks" on the edge of the ship are all fondant.
Next , I used silver luster dust and water to paint the bottle cap and tacks to resemble metal, and piped a border of red icing around the base of the cake to hide the flaws in the fondant. The finished cake looked like this:
My fiance loved it! And frankly, I was surprised that it turned out at all. Although there were some visible flaws, I was actually really proud of the finished product.
I had to laugh - a bunch of the people at the party said they thought I should do this for a living... I told them it would involve far too many cuss words for me to retain my self respect! It wasn't even close to being a professional-grade product. I think I'll stick to the smaller canvas of cupcakes for now!
Have a happy Memorial Day weekend! Next week, I'll fill you in on our Phoenix Cupcake Safari. Until then, let me leave you with a picture of the cake carnage...
Love,
CaraCakes
Friday, May 23, 2008
Thursday, May 15, 2008
Mother's Day Mayhem - Part 2!
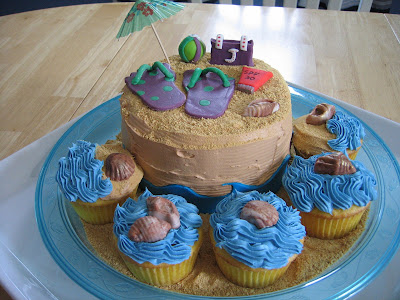
Sorry to keeep you waiting on cake #2! It's been a 3-cake week for me (more on #3 later) and I have hardly had time to even think, let alone post a blog! As promised, here are the pics from the Mother's Day cake I made for my mom:
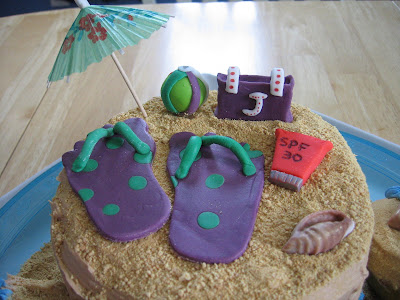
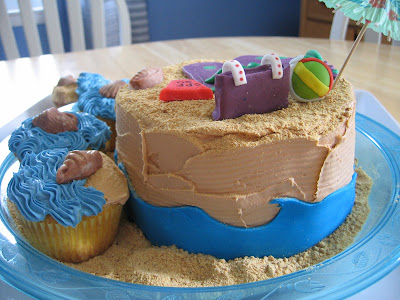
I wanted to make something really summery for my beach-loving mom. This was a lemon layer cake/lemon cupcakes with the same raspberry cream filling I made to go in the Naughty Cupcakes a couple months ago. I added 1t. of raspberry extract to really kick up the flavor of the filling. It was a perfect complement for the light, springy lemon cake.
One of my cake-making friends gave me a hint on how to prevent your filling from oozing out between the layers of your cake when you're frosting it, and it worked so well I'd like to share it with you. Before applying your filling to your layers, pipe a ring of your frosting around the outside edge of the layer, making a frosting barrier between the filling and the edge of the cake. Works like a charm!
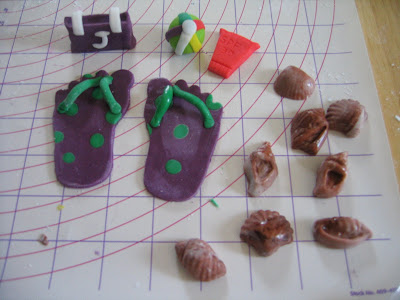
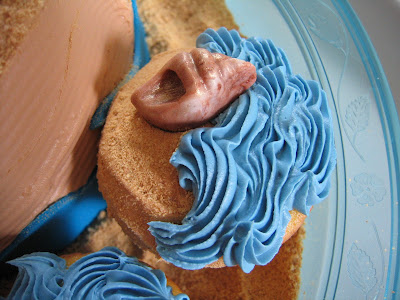
Once the cake was frosted and the cupcakes were given watery waves of blue icing, I rolled out a strip of blue fondant and hand-cut a wave pattern, then wrapped it around the outside of the cake. I dusted the top and sides of the cake and 2 cupcakes with graham cracker crumbs to give it a sandy effect and topped with the sea shells and beach fondant decorations I made the week prior (giving them plenty of time to dry!). The only thing on the cake that is not edible is the umbrella.
Each cake I make, I'm learning more and more about how to work with fondant. It's definitely less intimidating each time around! When I was in Atlanta, I bought the chocolate molds for the seashells, as well as the edible metallic luster dust I applied to the "cap" of the sunscreen bottle and the tops of the seashells to make them shimmer. I've heard you can mix the luster dust with clear vanilla extract or vodka, but I've been using water and have had great success. The water does make the fondant sticky, so you have to be careful not to touch it until it's had a lot of time to dry.
So that is cake #2! My cake #3 of the week is for a party tonight... more on this next week. Oh! And I still owe you a write up from the fabulous cupcake safari my sis and I went on in Phoenix last week! Too much to do and not enough hours in the day. Stay tuned!
Have a great weekend,
~CaraCakes
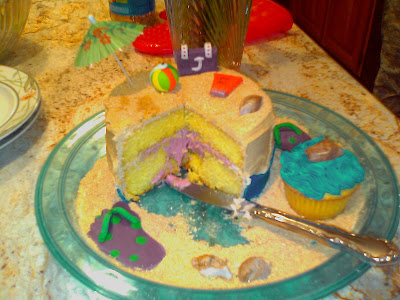
PS - My mom didn't wait to cut into her cake! Here's a fuzzy shot of the carnage from my camera phone...
Monday, May 12, 2008
Mother's Day Cake Mayhem!
Well, yesterday was Mother's Day. I hope you remembered to call your mom! If not, lemme tell you from past experience: a belated call today is 1000 times better than no call at all.
My fiance's parents live in a small, 2-stoplight town way up north in our great New England state, and my folks live about 20 minutes away in a suburb of our city. Being that both families are within driving distance, we have had to employ some creativity over the last 2 years in deciding which part of what holiday weekend to spend with which set of parents. Mother's Day was no exception to this quandary!
This year we drove the 3 hours north to spend Saturday evening and part of Sunday with my fiance's family. My mom graciously agreed to postpone her Mother's Day celebration until this evening, so we'll be heading over there for supper tonight. I decided to do a surprise cake for each of our moms to celebrate their special days and - of course! - get some much needed practice for the wedding cake.
A couple weeks ago, I bought a 6"x3" round cake pan that I'm going to use to make the top layer of our wedding cake. I hadn't experimented with it yet, so this weekend gave me a chance to test it out not once, but twice!
I figured that one standard cake mix would probably make enough batter to do the 6" round plus about a half dozen cupcakes, so my plan was to make a cake with a theme for each mom and display it surrounded by cupcakes that matched that theme.
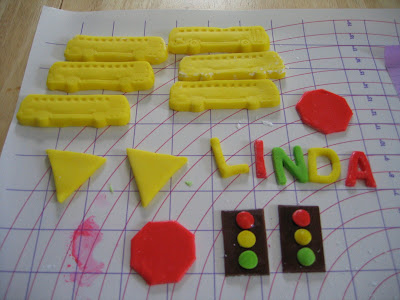
I started my theme-scheming with the cake for my future MIL (Mother-in-Law). She has been driving the school bus for their small town for years and years, and looooooves to tell stories about the bus. It's kind of a running joke in the family that you can't have a conversation about anything with MIL without her bringing the bus into it somehow. So I thought it would be fun to make a bus-themed Mother's Day cake for her with a fondant road on buttercream "grass", fondant buses, road signs and traffic lights.
Here's how it came out:
Since the decorations were all bright primary colors, I picked out a funfetti cake mix to coordinate the color scheme with the cake itself. I took a break from filling the cupcakes this time around and instead split the cake into 2 layers and frosted between them with the green buttercream.
The writing on the buses and signs was made using Wilton FoodWriters. I used a candy mold to get the buses the right shape, but everything else was fashioned by hand and I mixed all the fondant colors myself.
My only big challenge on this cake was getting the cake itself to bake evenly in that tall pan. It took about 40 minutes for the entire cake to set, and the middle had sunk a little due to my impatient poking and testing (I was afraid it might burn!). Thank goodness frosting covers a multitude of sins!
Despite the fact that it was less than perfect, I was very pleased with the results. The best reward, though, was how surprised MIL was. She took about a dozen pictures, and although the cupcakes disappeared quickly, by the time we left yesterday, that darn cake was still intact. She didn't want to cut into it and ruin my hard work. I kept telling her that it was meant to be eaten, not saved! I wonder if it will still be there the next time we go up to visit? Oh well!
One down... on to the second round! Come back tomorrow for part 2 of this post!
Labels:
bus cupcakes,
DIY fondant,
fondant buses,
mother's day,
school bus cake
Friday, May 2, 2008
Not exactly a cupcake...
... but it's wedding related, so I think it counts!
My fiance's aunt is going to be the officiant at our wedding. She works for a bank and is a notary, and as a matter of policy "doesn't do weddings," but in our case she was willing to make an exception. His aunt lives up North in the small, 2-stoplight town with the rest of the family on his mom's side, and hadn't yet visited us in the "big city."
It happened that she and her hubby were going to be in town Monday, and we invited them over to see the house and have some dessert. Had I more time to come up with a plan and a theme, I would have practiced my cupcake and fondant techniques. However, on short notice, I decided to opt for a family favorite instead -- mom's Buster Bar.
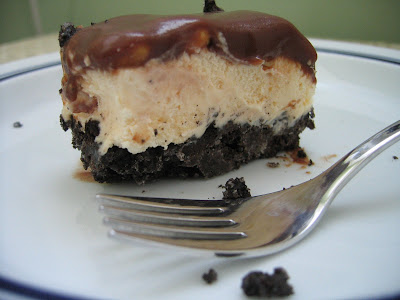
Buster Bar is so called for the Dairy Queen dessert of the same name, which is basically a vanilla ice cream treat on a stick with hot fudge and peanuts in the middle. In mom's version, an oreo cookie crust is layered in a 9x13 pan, topped with vanilla ice cream, spanish peanuts, and a homemade hot fudge sauce, then frozen solid and cut into squares.
This dessert is so good that I usually ask mom to make it in lieu of a birthday cake for me every June. My dad says "it's better than homemade sin" - whatever that means. Try this one for a summer gathering. You won't be disappointed!
"Mom's Truly Delicious and Magnificent Buster Bar" (this is how she labeled it in her email! The recipe below is hers, verbatim.)
Crust:
Crush 1 bag of Oreos
Add 1/2 cup melted butter
Mix and pack into 9x13 (or larger) pan.
Freeze.
Second Layer:
Cut 1 gallon vanilla ice cream into slices and lay on top of crust.
Smooth together.
Add 1 1/2 c. spanish peanuts over top.
Freeze.
Hot Fudge Sauce:
Boil for 8 minutes:
2 c powdered sugar
1 1/2 c milk
2/3 c chocolate chips
1/2 c butter
1 t vanilla
Cool to room temperature. Pour over top of peanuts and Freeze.
When I make this, I add the vanilla extract after the hot fudge sauce has cooled to room temp. The key to good Buster Bar is making sure that you freeze the layers in between, that the hot fudge sauce is truly at room temp when you spread it, and that the whole thing has at least 8 hours to set in the freezer before attempting to slice and serve.
You could also make this hot fudge sauce just to serve with ice cream on a hot summer day. It would be fabulous if you added a bit of coffee, or some raspberry flavoring, or even some orange zest.... yummm! Now I'm thinking I might need to go and make up a batch just for fun!
Subscribe to:
Posts (Atom)